Showing posts with label photoshop. Show all posts

September 7, 2009

Illustrator Tutorial : Cutaway Technical Illustration

illustrator tutorials, illustrator tutorialThis is a free illustration tutorial designed to provide helpful information related to computer graphics. Additionally, there are detailed step-by-step Adobe Illustrator and Photoshop tutorials, tips and tricks for technical illustration students, professional technical illustrators and digital artists.
All of the initial line artwork was done in vector based Adobe Illustrator CS. Most of the final color work (Page 2 - Photoshop Tutorial) was done in Adobe Photoshop. The techniques used in this demonstration tutorial are applicable to any 3 dimensional perspective drawing, regardless of scale or complexity.
This illustrator tutorial project presented many unique challenges. The actual ship (Radiance of the Seas) was still in Germany being completed for Royal Caribbean when I started the project. There was no photography or CAD reference to work from, only the paper blueprint you see below. In order to have the brochures completed by the time the ship went into service, the final illustration had to be finished in under two months.

The first step was to map out the physical space that the ship would occupy (below) by creating a perspective grid. By establishing a horizon line and vanishing points, an angle was developed that showed the maximum amount of features on the ship.
Technical Note: This type of angle is generally referred to as a 3/4 perspective view. For more information on perspective drawing techniques used in mechanical drafting and architectural drawing, go to: 2 Point Perspective Drawing Tutorial.

Download free tutorial "Illustrator Tutorial : Cutaway Technical Illustration" here!

Continue to read...

September 4, 2009

Photoshop Tutorial : Creating Flaming Text

photoshop tutorial, photoshop basic tutorial, flaming text tutorialThis tutorial will guide you in creating a flaming text effect in Adobe Photoshop. Photoshop may be a very powerful software program used by design professionals around the world, but this photoshop tutorial is designed for anyone with a basic knowledge of the program. The first time you use this photoshop tutorial, it should take you around twenty minutes to create your flaming text from start to finish, but that time may vary depending on your skill level in Photoshop. After completing this photoshop tutorial, you will hopefully have learned something new about the amazing software that is Adobe Photoshop.

This tutorial was designed around Adobe Photoshop CS2, so if you are running a different version of Photoshop on your computer, some of the images below may not be the same ones that you see.
Download Free PDF Tutorial "Photoshop Tutorial : Creating Flaming Text" here!

Continue to read...

Photoshop Tutorial : CREATE A DIGITAL FIRE

photoshop tutorial, fire effect with photoshopWord from author "This is one of the more creative use of filters I have run across. The effect itself may be more frivolous than useful, but this technique does show off how experimenting with Photoshop’s different filters can produce some interesting results."
This photoshop tutorial is about to make fire with standard efect photoshop bundle. With only 4 steps technique you can create your own fire effect like pro. This photoshop tutorial is easy to follow even with beginner.

The basic steps of this technique has been floating around the Internet and on different online services for a couple years. The first version of this technique I remember reading was a small text file titled “Sal’s Flaming Text Effect.” Since then the basic steps have been covered in a variety of different places.
This issue starts with the step-by-step procedure for creating the basic flaming effect. Then we add a technique to allow you to lay your flames over another background image. Finally you can combine several layers to create the example at the bottom of the page.

Download Free PDF Tutorial here!

Continue to read...

September 2, 2009

Photoshop & Painter Tutorial : How to Draw Manga

how to draw manga, drawing mangaThis tutorial guides you through the process of drawing and colouring a manga picture. Manga artwork often suffers the unfair stigma of appearing all the same. Although there are general stylistic conventions, every artist interprets it differently, creating a host of unique styles. The more you draw, the faster you will discover your own style, both in character design and colouring. The colouring technique outlined here was done in Photoshop CS and Painter IX.

Word from author "I also used a graphics tablet, which is an invaluable tool for anyone going into digital art. Wacom tablets often come with a free version of Painter Essentials. Although it’s not as good as the full version, the effects demonstrated in this tutorial can be re-created (with a bit of practice) in Painter Essentials.
I like to sketch and ink by hand, then scan the outlines and colour them on the computer. Great care should be taken over the sketch because it forms the backbone of your work. Even the best colouring technique won’t be able to salvage a poor, out-of-perspective drawing. When sketching, I check for mistakes by holding the drawing up to a mirror. Inking is done in black ink, with a thin fineliner or nib pen. When working digitally, my files will most likely be in PSD format (to support layers). The final image is then flattened and saved as a TIFF or JPEG (at least 300 DPI). TIFF is better quality for print. JPEG has a very small file size, making it suitable for pictures on the web."

Download Free PDF Tutorial "Photoshop & Painter Tutorial : How to Draw Manga" here!

Continue to read...

GUIDE TO COMIC MAKING IN PHOTOSHOP

how to draw comic, making comic with photoshopWord from author "Okay, so you wanna make a comic, but dont know how? I'll show you how I make my comics. Throughout this tutorial, I will be using Adobe Photoshop 7.0. If you have a different version, some things may be different for you. Just try to make things work.

All right, now, how to start? Ah yes. Creating a Photoshop document. Open up Photoshop and choose New from the File menu (or press Ctrl-N). A dialog box will open up asking for the dimensions of the image. Since I'm creating a six-panel comic using backgrounds from 16-bit games, I'm gonna make the dimensions 643x758 pixels. (You can edit this to suit your needs.) Leave the Resolution settings...

Download Free PDF Tutorial "GUIDE TO COMIC MAKING IN PHOTOSHOP"here!

Continue to read...
August 19, 2009

The Photoshop Anthology

photoshop tutorial, photoshop guide, photoshop web tutorialThere are hundreds of online tutorials about creating various web graphic effects in Photoshop. This book shows you how to create many of those same effects, but most solutions include a “Discussion” section that goes beyond the “step-by-step” stage to explain some of the concepts behind the solution, enabling you to understand more of how Photoshop works so that you can apply that knowledge in other situations. One of the most valuable solutions in this book, and which can be found at the beginning of Chapter 8, gives you a conceptual “road map” of how to use Photoshop in the web design process and illustrates it with an example that combines many of the techniques explained in earlier chapters.

Because this book is focused towards web designers, it cover only some of the basic and intermediate tasks related to photo adjustments and retouching. If this area interests you, there are many excellent books, geared towards professional photographers and artists, which provide more advanced instruction than doesthis title.

Download PDF File here!

Continue to read...

Photoshop CS Tips and Tricks

photoshop tips, photoshop tricks, photoshop tops tricks, photoshop tutorialThis Adobe Photoshop CS Tips and Tricks is show you how to explore photoshop tools like a pro. You can follow this tutorial even you are a beginner. so enjoy this "Photoshop CS Tips and Tricks"!


This Adobe Photoshop CS Tips and Tricks Contents :
F-stop corrections • Creating Metallic Type • Smoke • Creating the Magical Mirror • Effect • Creative Photo Cropping • Lightblast! • Total Contrast Control Using Two Images • Digital Light Painting • Woodcuts • Photo Filters to the Rescue • Gif Animation:Swipe Effect • Working with Lens Blur • Looking Through a Glass • Rain Drops

Download PDF File here!

Continue to read...

July 27, 2009

Photoshop Tutorial : Infrared Photo Effect

Photoshop Tutorial : Infrared Photo EffectIn this Adobe Photoshop tutorial, we’re going to learn how to simulate the look of infrared photography in Photoshop. We’ll be taking a look at Photoshop’s Channels palette and seeing how to isolate a color channel as well as howto apply filters to color channels, we’ll be using adjustment layers, specifically the Channel Mixer adjustment layer to adjust how much impact each individual channel has on the image, we’ll be using a few different layer blend modes, adding some noise, and at the end, seeing how to bring some of the color from the original image back into the effect.

The term “infrared” literally means “below red”, and without getting into science or color theory, that means we as human beings can’t see it. Yet even though you and I can’t see infrared light, most digital cameras can, and with the use of an infrared lens filter, infrared photography can bring that light within our visible range, capturing and creating images that have a truly unique, mysterious and otherworldly look to them. Fortunately, this same look can be created quite easily in Photoshop, as we’ll see in this tutorial.
Since different objects in the world reflect different amounts of infrared light, the results you get with this effect will depend a lot on which type of photo you’re using it with. Outdoor scenes with lots of green trees and foilage tend to work best, and that’s what I’ll be using for this tutorial, but try it out with other types of photos as well to see what you get.

Download Photoshop Tutorial : Infrared Photo Effect PDF File here!

Continue to read...

Photoshop Tutorial : Creating a Border Background

Creating a Border Background, photoshop tutorialThis Photoshop Tutorial will provide a basic introduction to creating a graphic left side border background for Web pages with plenty of screenshots and helpful tips along the way. Although this tutorial is geared for making Web graphics with Photoshop CS3, it also works for Photoshop 5.5 and above. This tutorial will also work with PaintShop Pro 6 and above, too.

Once you've effectively learned how to use the tools explained here, you'll probably be able to create a background graphic in less than 10 minutes, from start to finish. In addition, once you've made one that you like, you can use it as a template or guide, substituting colors, altering the drop shadow, changing the width of the border, and changing a number of things from the original background graphic, saving it with a different name to maintain your original file.

Download Creating a Border Background with Photoshop PDF File here!

Continue to read...

July 22, 2009

Adobe Photoshop CS4 Tutorial Wrap Corner Curls

Adobe Photoshop CS4 Tutorial, photoshop tutorialYou ever wonder how graphic designers make the corners of documents appear wrapped with a curl. In this tutorial we are going to apply the wrap to the side of a panel delivery truck. The truck we’re working with should be a side profile of a delivery truck. We will make the graphic look like the corner of the truck was being peeled or curled back so that you could see the boxes stacked up inside.

This Adobe Photoshop CS4 Tutorial Wrap Corner Curls contents 9 Steps.
Download Adobe Photoshop CS4 Tutorial Wrap Corner Curls PDF file here!

Continue to read...

Photoshop 6 : Create Basic Colored Shaded Relief

Photoshop basic, Create Basic Colored Shaded ReliefAdobe Photoshop is the graphic arts industry standard software for raster image manipulation. Cartographers can also use Photoshop to create effective colored shaded relief for maps.
One important advantage in using Photoshop to create shaded relief is that of familiarity. Most cartographers and graphic artists have Photoshop on their desktop and are skilled in using it for working with images. It is an extremely powerful image-editing tool and a skilled cartographer can make many enhancements to a shaded relief map image once it is rendered.

What you will need :
Adobe Photoshop 6 or 7 running in MacOS or Windows
Digital elevation file converted to a “grayscale to height image” (for the sample image used in this tutorial, go to http://www.equatorgraphics.com/nacis/mt_moran_g2h.tif)

Get this tutorial Photoshop 6 : Create Basic Colored Shaded Relief PDF file here!

Continue to read...

July 21, 2009

Adobe Photoshop CS3 - Shortcuts, Tips & Tricks

In Photoshop CS3,many of the shortcuts for the application menus,palette menus and tools can be customized using the Keyboard Shortcuts Editor. Although this document mentions some of these “customizable” shortcuts, it also provides additional functionality only accessible through the use of keyboard modifiers (which can’t be changed through the Keyboard Shortcut editor). Although this is not a completely comprehensive list of all of the keyboard shortcuts in Photoshop CS3.

Word from author "it is my goal to present the shortcuts and additional functionality that enable me to use Photoshop CS3 both more freely and efficiently."
In order to help organize the document,This Adobe Photoshop CS3 - Shortcuts, Tips & Tricks subdivided into the following categories: The Tool Palette - Palette Shortcuts - Document Navigation - Basic Shortcuts - “Everything”Layers- Advanced Shortcuts - Trouble Shooting

Download Adobe Photoshop CS3 - Shortcuts, Tips & Tricks PDF file here!

Continue to read...

Adobe Photoshop Scripting Guide

This Adobe Photoshop Scripting Guide provides an introduction to scripting Adobe® Photoshop® CS4 on Mac OS® and Windows®.
Chapter 1 covers the basic conventions used in this manual.
Chapter 2 covers a brief overview of scripting, how to execute scripts, and the Photoshop object model.
Chapter 3 covers Photoshop-specific objects and components and describes advanced techniques for scripting the Photoshop application. Code examples are provided in three languages: AppleScript, VBScript and JavaScript.
Chapter 4 covers the Action Manager, which allows you to write scripts that target Photoshop functionality that is not otherwise accessible in the scripting interface.

This Adobe Photoshop Scripting Guide contents :
Introduction - About this Manual - Conventions in this Guide - Photoshop Scripting - Basics - Scripting Overview - Why use scripts instead of actions? - Scripting Support in Photoshop - JavaScript support - Executing other scripts - Startup scripts - Executing JavaScripts from AS or VBS - Photoshop Object Model - Containment hierarchy - Application and document classes - Layer classes - Layer Comp class - Channel class
Selection class - History State class - Document Info class - Path Item, Sub Path Item, and Path Point classes - Preferences class - Notifier class - Count Item class - Color Sampler class - Measurement Scale class - The containment hierarchy and the - Photoshop user interface - Additional objects - Constants - Creating a sample Hello World script - Creating and running an AppleScript - Creating and running a VBScript - Creating and running a JavaScript - Scripting Photoshop - Viewing Photoshop Objects, Commands, and Methods - Viewing Photoshop’s AppleScript dictionary - Viewing Photoshop’s type library (VBS) - Targeting and Referencing the Application Object
Creating New Objects in a Script - Setting the Active Object - Setting the active document - Setting the active layer - Setting the active channels - Opening a Document - Opening a file with default file format - Specifying file formats to open - Saving a Document - Setting Application Preferences - Allowing or Preventing Dialogs - Working with the Photoshop Object Model - Using the Application object - Using the Document object - Manipulating a document object - Working with layer objects - Creating an ArtLayer object - Referencing ArtLayer objects - Working with Layer Set objects - Linking layer objects - Applying styles to layers - Using the Text Item object
Determining a layer’s kind - Adding and manipulating text in a Text Item object - Working with Selection objects - Creating and defining a selection - Stroking the selection border - Inverting selections - Expanding, contracting, and feathering selections - Filling a selection - Loading and storing selections - Working with Channel objects - Changing channel types - Using the Document Info object - Using history state objects - Using Notifier objects - Using the PathItem object - Working with color objects - Solid color classes - Using hex values for RGB color - Getting and converting colors - Comparing colors - Getting a Web-safe color - Working with Filters - Other filters - Understanding Clipboard Interaction - Using the copy and paste commands - Using the copy merged command/method - Working with Units - Unit values - Special unit value types - AppleScript unit considerations - Using unit values in calculations - Unit value usage - Setting ruler and type units in a script
Sample Workflow Automation JavaScripts - Advanced Scripting - Working with document preferences - Applying color to a text item - Applying a wave filter - Defining the area of a selection object - Applying a MotionBlur filter - Action Manager - The ScriptListener Plug-In - Installing ScriptListener - Action Manager Scripting Objects - Recording a Script using ScriptListener - Using the Action Manager from JavaScript - Using the Action Manager from a VBS Script - Running JavaScript-based Action Manager code from VBScript - Running JavaScript-based Action Manager code from AppleScript - Using ScriptListener to find event IDs and class IDs - Index
Site link here!

Continue to read...

May 19, 2009

Photoshop Tutorial - Expressive Lighting Effects


Lighting effects are an effective way to add a detailed illustrative touch to a photo. Justin Maller demonstrates how to go about combining several lighting techniques. A word from Justin Maller : "In this tutorial, I’m going to look at (among other things) ways of bringing originality to digital lighting by introducing and vectoring traditional sketches, as well as examining some nifty Illustrator-based stroking techniques that achieve results with the greatest of ease."

Lighting effects are a versatile set of techniques that have recently come back into vogue in advertising and the fashion press. Lights and tracing motion effects can become part of the composition, adding brightness and motion to an image.

Download Photoshop Tutorial - Expressive Lighting Effects here!

Download support file Photoshop Tutorial - Expressive Lighting Effects here!

Continue to read...

April 27, 2009

Photoshop Tutorial: Creating Zombie

This Photoshop CS2 tutorial will show you how to rot people’s face, expose their skull and turn them into zombie.

Site link Photoshop Tutorial: Creating Zombie

Continue to read...

Photoshop Tutorial- Amp Up Your Photographs

The tutorial is really good. A kick ass lighting technique to bring more energy to your photographs. Although I am using a shot I took at a concert, you can do this on pretty much any picture.

Site link Photoshop Tutorial- Amp Up Your Photographs

Continue to read...

April 8, 2009

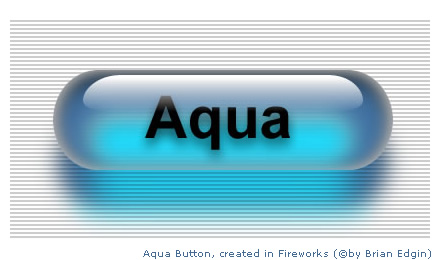
Create Aqua buttons with Photoshop

button tutorial, photoshop button tutorialThis photohop tutorial show you how to make the brightly colored, glassy buttons that originated from Apple's Aqua interface many years ago, and since then have come to be affectionately known as "aqua buttons".

Targeted at Photoshop beginners, here's the second instalment -- it's time to further develop your button-creating skills! Great photoshop tutorial!
Site link here!

Continue to read...

April 2, 2009

3D Burning Text Photoshop Tutorial

3D Burning Text Photoshop Tutorial, 3D Burning Text Illustrator TutorialThis awesome tutorial is using illustrator and photoshop to create 3d burning text effect. This photosho and illustrator tutorial is amazing! You will love to reading this guide because they turn out amazing. The final result of this fantastic work is awesome.

Site link here!

Continue to read...

Spectacular flaming meteor effect on text with photoshop and illustrator

Spectacular flaming meteor tffect on text with photoshop and illustrator, text effect photoshop tutorial, text effect illustrator tutorialHow about text falling from the sky in a burning inferno. Yeah, this is the text-on-fire illustrator tutorial and photoshop tutorial. It uses a little Illustrator for the text and a lot of Photoshop to burn up the screen!

With illustrator you can make awesome 3D text. With photoshop, you can add thus 3D text with cool effect that makes a good wallpaper "Spectacular flaming meteor effect on text".
Site link here!

Continue to read...

Button photoshop tutorial

plastic button icon photoshop good tutorialThis good tutorial tell you how to make a Maple leaf website plastic button in photoshop. This tutorial is easy to follow even with beginner. You can make your own button with following this photoshop tutorial. Enjoy!

Site link here!

Continue to read...