July 29, 2009

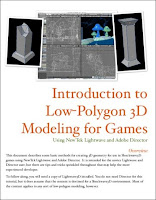
Low-Polygon 3D Modeling for Games

lowpoly modeling tutorial, tutorial game modeling, pdf tutorialThis document describes some basic methods for creating 3D geometry for use in Shockwave3D games using NewTek Lightwave and Adobe Director. It is intended for the novice Lightwave and Director user, but there are tips and tricks sprinkled throughout that may help the more experienced developer.

To follow along, you will need a copy of Lightwave3D installed. You do not need Director for this tutorial, but it does assume that the content is destined for a Shockwave3D environment. Most of the content applies to any sort of low-polygon modeling, however.

Download Low-Polygon 3D Modeling for Games PDF File here!

Continue to read...

July 27, 2009

Flash Tutorial : Make A Drag and Drop Game

Flash Tutorial, flash game tutorial, game tutorialIn this Flash Tutorial tutorial, you will learn how to make a simple drag and drop game in Flash 8. This will involve creating a series of movie clips and adding some actionscript that makes them able to be dragged to any location on the screen.

In this game, users can choose different clothing items and drag them on or off the Gidgit girl. Note that the clothing is on a layer above the girl image so that it always appears in front.
The Flash Classroom site contains a number of other tutorials covering different types of drag and drop games. These include a tutorial which snaps the object back into the original location if it is moved to an incorrect spot and another that provides the user with a response if they move the object to a correct location.
These games are slightly more sophisticated and provide the user with more feedback. They are very useful for a range of educational games including sequencing activities, matching games, cloze activities and more.

Download Flash Tutorial : Make A Drag and Drop Game PDF File here!

Continue to read...

After Effect Tutorial : Compositing Basics

After Effects Tutorial, Compositing BasicsThis After Effect tutorial is a continuation of the “VIllus Capillary” tutorial where you went through the basics of creating a Maya scene from A-to-Z. You’re now ready to stitch together a final movie from the individual sequences of images that were rendered in Maya. In addition to simply ‘stitching’ the sequences together, we will explore a few different compositing tasks as well.

For example, there are benefits to rendering a single image/shot into multiple ‘render passes’ where different elements of the scene are separated out onto different layers and rendered independently with an alpha channel (i.e. transparency information). These passes need to be overlaid and blended together in ‘post’ (i.e. in a compositing package like After Effects). With this extra step you gain additional control over processes that would otherwise take longer to render ‘in camera’ (i.e. in your 3D package). We will composite together one of the sequences from your movie in order to add fake depth-of-field effects (i.e. blurring), a process that can be tricky and processor-intensive at render time in Maya.

Download After Effects Tutorial : Compositing Basics PDF File here!

Continue to read...

Photoshop Tutorial : Infrared Photo Effect

Photoshop Tutorial : Infrared Photo EffectIn this Adobe Photoshop tutorial, we’re going to learn how to simulate the look of infrared photography in Photoshop. We’ll be taking a look at Photoshop’s Channels palette and seeing how to isolate a color channel as well as howto apply filters to color channels, we’ll be using adjustment layers, specifically the Channel Mixer adjustment layer to adjust how much impact each individual channel has on the image, we’ll be using a few different layer blend modes, adding some noise, and at the end, seeing how to bring some of the color from the original image back into the effect.

The term “infrared” literally means “below red”, and without getting into science or color theory, that means we as human beings can’t see it. Yet even though you and I can’t see infrared light, most digital cameras can, and with the use of an infrared lens filter, infrared photography can bring that light within our visible range, capturing and creating images that have a truly unique, mysterious and otherworldly look to them. Fortunately, this same look can be created quite easily in Photoshop, as we’ll see in this tutorial.
Since different objects in the world reflect different amounts of infrared light, the results you get with this effect will depend a lot on which type of photo you’re using it with. Outdoor scenes with lots of green trees and foilage tend to work best, and that’s what I’ll be using for this tutorial, but try it out with other types of photos as well to see what you get.

Download Photoshop Tutorial : Infrared Photo Effect PDF File here!

Continue to read...

Photoshop Tutorial : Creating a Border Background

Creating a Border Background, photoshop tutorialThis Photoshop Tutorial will provide a basic introduction to creating a graphic left side border background for Web pages with plenty of screenshots and helpful tips along the way. Although this tutorial is geared for making Web graphics with Photoshop CS3, it also works for Photoshop 5.5 and above. This tutorial will also work with PaintShop Pro 6 and above, too.

Once you've effectively learned how to use the tools explained here, you'll probably be able to create a background graphic in less than 10 minutes, from start to finish. In addition, once you've made one that you like, you can use it as a template or guide, substituting colors, altering the drop shadow, changing the width of the border, and changing a number of things from the original background graphic, saving it with a different name to maintain your original file.

Download Creating a Border Background with Photoshop PDF File here!

Continue to read...

July 23, 2009

Making of an Audi R-8

3ds max modeling tutorialIn this Making of, you will learn how to model an Audi R-8; or any vehicle for that matter. The principal is the same. For this Making of, you will need at least an intermediate knowledge of 3DS Max, or your preferred 3d application. This making of will be using 3DS Max 9, so if you have an older version or if you are using a different 3d application, your button configuration maybe be slightly different.

Word from author "I typically use vehicle blueprints, when available, for the modeling process. Although, you can use any reference photographs as well. When you are modeling
vehicles, you want to have plenty of reference photographs to view. I have over sixty reference photographs that I will be using throughout the entire time that I am modeling this vehicle. As you are gathering your reference photographs, you want to select many different angles, close-ups of certain parts; such as, headlights, tailights, wheels, and any distinct or unique grooves or parts of the vehicle. You can find all of the reference photographs by doing an image search in google or yahoo.

Something you have to realize, is that vehicle modeling is not easy or simple. There is no certain way to model a vehicle. Some people use box modeling, others use polygonal modeling or poly modeling, some use NURBS modeling or spline modeling. What I will be using and my personal preference is poly modeling. That is where you extrude the edge of a polygon to form the shape that you want. There is not a certain place to start your modeling when modeling a vehicle. Some start at the hood, some at the front drivers side fender well, some at the rear, and some at the roof of the vehicle. I usually start at the front drivers side fender, however, that is just your personal preference."

Download Making of an Audi R-8 PDF File here!

Continue to read...

Basic modelling in 3Ds Max

Basic modelling in 3Ds Max, 3ds max basicThis original tutorial was created in 2003 for 3D studio Max 3, all the latest versions of max will have the same tools but they may be accessed in a slightly different manner.
3D Max has a few basic tools you can use for Polygon modelling, although there are many other tools used by Artists to create models and by Designers to block out ideas or levels, the following tools are the ones used in the main to create low polygon in game models. It is also a good way to learn the basics of 3D modelling.

Believe it or not if you can do this tutorial you have learned most of what you need to be able to create low end models in Max for use in video games, of course it is very time consuming and you may not be able to create anything amazing at first but in time these basic tools will serve you well.

Download PDF File here!

Continue to read...

3ds Max 8 Visual Handbook

This book was written for artists, designers, students, teachers, working professionals, and anyone who wants to build their dreams. At the beginning of each chapter, the introduction gives you a sense of the possibilities.The section headings present the theory you need just in time to do the step-by-step tasks that follow. Tips and tables give you important clues about pitfalls, shortcuts, and advanced techniques. By studying both the theory and the mechanics, you will be equipped not only to push the right buttons, but also to create art, solve problems, and invent solutions.

3ds max is one of the most powerful desktop 3D graphics programs available today. It is used for a wide variety of commercial and artistic applications, including architecture, computer games, film production, web design, forensics, medical visualization, scientific visualization, virtual reality, and fine art.
The chapters of the book are meant to be followed in order, but each one is designed to be able to stand alone. If you are new to 3ds max, the best thing to do is start at the beginning and work your way through the topics in order. More advanced students may want to skip to areas of particular interest.To use this book as a “how to” reference, look up your task in the table of contents or look up topics in the index. Extensive tables of commands may be found in the chapters as well as in the appendices.

Chapter 1 gets you up and running, from installing the program to navigating the interface and learning essential file commands.
Chapters 2–4 teach you how to create and select objects, control the display, render images, and navigate 3D scenes. Since the last edition of this book, new objects, group commands, and sidebars have been added.
Chapters 5–7 show you how to manipulate and animate objects using transforms, modifiers, and animation controllers.The sequence of topics has been significantly revised, in accordance with changes to the user interface as well as for clarity.
Chapters 8–10 explain more advanced modeling techniques, including sub-object editing and compound objects. New to this edition are sections on polymesh editing in Chapter 8 and AEC Objects in Chapter 10.
Chapters 11 and 12 describe the use of lights and cameras for illuminating and composing views of your scenes.The section on animating cameras in
Chapter 12 has been expanded to include more on walkthrough, flythrough, and flyby animations.
Chapters 13 and 14 cover materials and mapping, so that you can make your scenes realistic as well as beautiful. Special care went into these chapters to make the figures larger and more beautiful.
Chapter 15 rounds out the book with rendering and shows you how to add effects to produce high-quality pictures and movies. Many new figures have been added here for clarity, beauty, and visual interest.

Enjoy!

Download 3ds Max 8 Visual Handbook PDF File here!

Continue to read...

July 22, 2009

Adobe Photoshop CS4 Tutorial Wrap Corner Curls

Adobe Photoshop CS4 Tutorial, photoshop tutorialYou ever wonder how graphic designers make the corners of documents appear wrapped with a curl. In this tutorial we are going to apply the wrap to the side of a panel delivery truck. The truck we’re working with should be a side profile of a delivery truck. We will make the graphic look like the corner of the truck was being peeled or curled back so that you could see the boxes stacked up inside.

This Adobe Photoshop CS4 Tutorial Wrap Corner Curls contents 9 Steps.
Download Adobe Photoshop CS4 Tutorial Wrap Corner Curls PDF file here!

Continue to read...

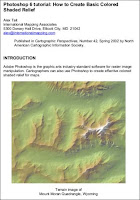
Photoshop 6 : Create Basic Colored Shaded Relief

Photoshop basic, Create Basic Colored Shaded ReliefAdobe Photoshop is the graphic arts industry standard software for raster image manipulation. Cartographers can also use Photoshop to create effective colored shaded relief for maps.
One important advantage in using Photoshop to create shaded relief is that of familiarity. Most cartographers and graphic artists have Photoshop on their desktop and are skilled in using it for working with images. It is an extremely powerful image-editing tool and a skilled cartographer can make many enhancements to a shaded relief map image once it is rendered.

What you will need :
Adobe Photoshop 6 or 7 running in MacOS or Windows
Digital elevation file converted to a “grayscale to height image” (for the sample image used in this tutorial, go to http://www.equatorgraphics.com/nacis/mt_moran_g2h.tif)

Get this tutorial Photoshop 6 : Create Basic Colored Shaded Relief PDF file here!

Continue to read...

July 21, 2009

Adobe Photoshop CS3 - Shortcuts, Tips & Tricks

In Photoshop CS3,many of the shortcuts for the application menus,palette menus and tools can be customized using the Keyboard Shortcuts Editor. Although this document mentions some of these “customizable” shortcuts, it also provides additional functionality only accessible through the use of keyboard modifiers (which can’t be changed through the Keyboard Shortcut editor). Although this is not a completely comprehensive list of all of the keyboard shortcuts in Photoshop CS3.

Word from author "it is my goal to present the shortcuts and additional functionality that enable me to use Photoshop CS3 both more freely and efficiently."
In order to help organize the document,This Adobe Photoshop CS3 - Shortcuts, Tips & Tricks subdivided into the following categories: The Tool Palette - Palette Shortcuts - Document Navigation - Basic Shortcuts - “Everything”Layers- Advanced Shortcuts - Trouble Shooting

Download Adobe Photoshop CS3 - Shortcuts, Tips & Tricks PDF file here!

Continue to read...

Adobe Photoshop Scripting Guide

This Adobe Photoshop Scripting Guide provides an introduction to scripting Adobe® Photoshop® CS4 on Mac OS® and Windows®.
Chapter 1 covers the basic conventions used in this manual.
Chapter 2 covers a brief overview of scripting, how to execute scripts, and the Photoshop object model.
Chapter 3 covers Photoshop-specific objects and components and describes advanced techniques for scripting the Photoshop application. Code examples are provided in three languages: AppleScript, VBScript and JavaScript.
Chapter 4 covers the Action Manager, which allows you to write scripts that target Photoshop functionality that is not otherwise accessible in the scripting interface.

This Adobe Photoshop Scripting Guide contents :
Introduction - About this Manual - Conventions in this Guide - Photoshop Scripting - Basics - Scripting Overview - Why use scripts instead of actions? - Scripting Support in Photoshop - JavaScript support - Executing other scripts - Startup scripts - Executing JavaScripts from AS or VBS - Photoshop Object Model - Containment hierarchy - Application and document classes - Layer classes - Layer Comp class - Channel class
Selection class - History State class - Document Info class - Path Item, Sub Path Item, and Path Point classes - Preferences class - Notifier class - Count Item class - Color Sampler class - Measurement Scale class - The containment hierarchy and the - Photoshop user interface - Additional objects - Constants - Creating a sample Hello World script - Creating and running an AppleScript - Creating and running a VBScript - Creating and running a JavaScript - Scripting Photoshop - Viewing Photoshop Objects, Commands, and Methods - Viewing Photoshop’s AppleScript dictionary - Viewing Photoshop’s type library (VBS) - Targeting and Referencing the Application Object
Creating New Objects in a Script - Setting the Active Object - Setting the active document - Setting the active layer - Setting the active channels - Opening a Document - Opening a file with default file format - Specifying file formats to open - Saving a Document - Setting Application Preferences - Allowing or Preventing Dialogs - Working with the Photoshop Object Model - Using the Application object - Using the Document object - Manipulating a document object - Working with layer objects - Creating an ArtLayer object - Referencing ArtLayer objects - Working with Layer Set objects - Linking layer objects - Applying styles to layers - Using the Text Item object
Determining a layer’s kind - Adding and manipulating text in a Text Item object - Working with Selection objects - Creating and defining a selection - Stroking the selection border - Inverting selections - Expanding, contracting, and feathering selections - Filling a selection - Loading and storing selections - Working with Channel objects - Changing channel types - Using the Document Info object - Using history state objects - Using Notifier objects - Using the PathItem object - Working with color objects - Solid color classes - Using hex values for RGB color - Getting and converting colors - Comparing colors - Getting a Web-safe color - Working with Filters - Other filters - Understanding Clipboard Interaction - Using the copy and paste commands - Using the copy merged command/method - Working with Units - Unit values - Special unit value types - AppleScript unit considerations - Using unit values in calculations - Unit value usage - Setting ruler and type units in a script
Sample Workflow Automation JavaScripts - Advanced Scripting - Working with document preferences - Applying color to a text item - Applying a wave filter - Defining the area of a selection object - Applying a MotionBlur filter - Action Manager - The ScriptListener Plug-In - Installing ScriptListener - Action Manager Scripting Objects - Recording a Script using ScriptListener - Using the Action Manager from JavaScript - Using the Action Manager from a VBS Script - Running JavaScript-based Action Manager code from VBScript - Running JavaScript-based Action Manager code from AppleScript - Using ScriptListener to find event IDs and class IDs - Index
Site link here!

Continue to read...
Corel Painter 8 Tinting Visual Guide

Corel® Painter™ 8 is the leading Natural-Media® painting application. Corel Painter lets you simulate a wide range of art tools, from felt pens, charcoal, and colored pencils to water color and oils.
Corel Painter lets you experiment with the widest range of Natural-Media tools. You can expand your digital drawing and painting techniques with a portfolio of new features.

The application features a redesigned user interface, including a new toolbox, Brush selector bar, property bar, Info palette, and new palette design and behavior. Corel Painter also includes a Mixer palette that realistically mimics the traditional paint mixing experience. Digital water color, a new Sketch effect, and more than 400 new brushes all expand your creative potential.
You can create custom brush variants using the new Brush Creator, which includes the Randomizer, Transposer, and Stroke Designer. Corel Painter also includes redesigned layer masks and channels that provide a smoother workflow and greater compatibility with Adobe® Photoshop®.
This Corel Painter 8 Tinting Visual Guide Contents :
Welcome to Corel Painter 8 - Introduction - Tinting Concepts in Corel Painter 8 - Layer Compositing Methods- Brush Methods - Buildup Method - Cover Method - Wet Layer and Water Color Layer Brushes - Auto-Detection of Buildup and Cover Method Brushes - Tinting Tools in Corel Painter - Advanced Techniques in Corel Painter

Download Corel Painter 8 Tinting Visual Guide PDF file here!

Continue to read...

July 17, 2009

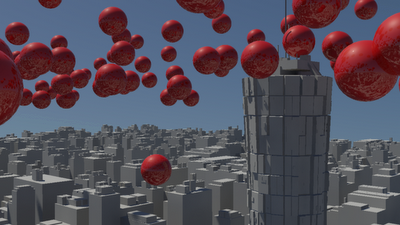
3DS Max Tutorial : Reactor Basic - Bouncing Balls

3DS Max Tutorial : Reactor Basic - Bouncing Balls

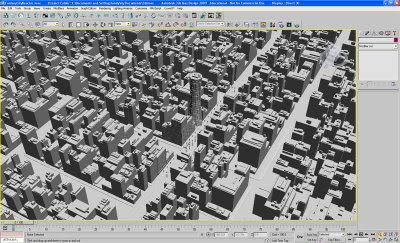
This 3D Max tutorial shows you how to create series of bouncing balls in a 3D City using Reactor in 3D Studio Max.

3DS Max Tutorial : Reactor Basic - Bouncing Balls

The tutorial works just as well with a simple plane if you would like to build the city at a later date.
Site link here!

Continue to read...