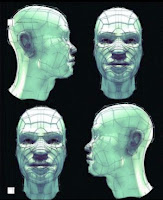
 Here are many ways in which to model a head in 3D. In this maya 3d modeling tutorial, we'll look at polygon modelling with subdivision smoothing for mesh refinement. This approach enables you to create the topology of the face mesh in a very direct and hands-on manner. With NURBS modelling, creating a human head can be problematic, and the best method involves stitching multiple surfaces together. This takes an awful lot of planning and isn’t a method you can jump straight into. Polygon modelling enables you to correct mistakes more fast and easily.
Correct topology (the way a surface is structured) is the single most important aspect of head modelling. We'll be creating special topological structures, known as ‘edge loops', which outline areas of the face and mimic the rings of muscle under the skin. Without proper loops, a head will be difficult to animate. We’ll also be making sure all the polygons have four vertices (called quads). A mesh of all quads is less likely to pinch when smoothed and animated. Although this tutorial uses Maya, the principles employed are applicable whatever app you use.
Download free tutorial "Maya Tutorial : Modeling a Perfect 3D Face" here!
Tutorial Free Resources and all about providing everyone good tutorials, free tutorials, illustrator tutorial, flash tutorials, animation tutorial, computer tutorial, 3ds tutorial, website tutorial, web design tutorial, photoshop tutorial, painting tutorial, free tutorial
