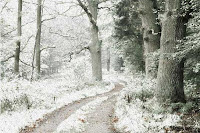
 In this Adobe Photoshop tutorial, we’re going to learn how to simulate the look of infrared photography in Photoshop. We’ll be taking a look at Photoshop’s Channels palette and seeing how to isolate a color channel as well as howto apply filters to color channels, we’ll be using adjustment layers, specifically the Channel Mixer adjustment layer to adjust how much impact each individual channel has on the image, we’ll be using a few different layer blend modes, adding some noise, and at the end, seeing how to bring some of the color from the original image back into the effect.
The term “infrared” literally means “below red”, and without getting into science or color theory, that means we as human beings can’t see it. Yet even though you and I can’t see infrared light, most digital cameras can, and with the use of an infrared lens filter, infrared photography can bring that light within our visible range, capturing and creating images that have a truly unique, mysterious and otherworldly look to them. Fortunately, this same look can be created quite easily in Photoshop, as we’ll see in this tutorial.
Since different objects in the world reflect different amounts of infrared light, the results you get with this effect will depend a lot on which type of photo you’re using it with. Outdoor scenes with lots of green trees and foilage tend to work best, and that’s what I’ll be using for this tutorial, but try it out with other types of photos as well to see what you get.
Download Photoshop Tutorial : Infrared Photo Effect PDF File here!
Tutorial Free Resources and all about providing everyone good tutorials, free tutorials, illustrator tutorial, flash tutorials, animation tutorial, computer tutorial, 3ds tutorial, website tutorial, web design tutorial, photoshop tutorial, painting tutorial, free tutorial
