September 15, 2009

Illustrator Tutorial : Japanese Style Tattoos

illustrator tutorial, making tattoos with illustrator, adobe tutorials, illustrator tutorialsWord from author : "In the first part illustrator tutorials of this three-part series I’ll be showing you step-by-step how to create beautiful outline art, but be sure to check out the next issue so that you can learn how to add colour, work with symbols and master the art of working with clipping masks." In part one of his new Adobe Illustrator tutorial masterclass on digital skin art, Derek Leareveals the benefits of using template layers and explains the intricacies of creating and working with custom brush strokes.

Illustrator’s brushes are the ideal tool for such a task; they provide flexibility, control, and lend themselves well to a non- linear workflow. When tracing your initial
sketch, a template layer will give you the opportunity to keep your sketch visible in
Outline or Preview mode. This way you can toggle between modes as you work, and have a constant visible guide.
Download free tutorial "Illustrator Tutorial : Japanese Style Tattoos" here!

Continue to read...

September 8, 2009

AutoCAD Tutorial : Create Basic 3D Objects

This tutorial outlines the procedures for creating three-dimensional objects by creating basic 3D shapes known as solid primitives. You can also create 3D models by extruding 2D shapes. Audience: Users new to 3D modeling with AutoCAD 2010. Prerequisites: Working knowledge of 2D drafting. Time to complete: 15 minutes.
Objectives of this AutoCAD Tutorial : Create Basic 3D Objects : Create 3D solid primitives and Create 3D objects from 2D objects.

In this lesson, you learn how to create 3D solid primitives in the 3D Modeling workspace.
You can use standard 3D solid objects known as solid primitives to create a box, cone, cylinder, sphere, torus, wedge, and pyramid. To create these 3D solid primitives, switch the workspace to 3D Modeling, where the palettes and ribbon panel are customized to create and modify 3D solid models.

Download free tutorial "AutoCAD Tutorial : Create Basic 3D Objects" here!

Continue to read...

September 7, 2009

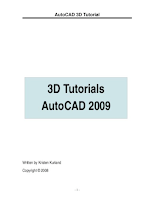
AutoCAD 3D Tutorial

autocad tutorials, autocad 3d tutorial, 3d tutorial, autocad tutorialThe AutoCAD workspaces are sets of menus, toolbars and dockable windows (such as the Properties palette, DesignCenter, and the Tool palettes window) that are grouped and organized so that you can work in a custom, task-oriented drawing environment. AutoCAD’s 3D Interface consists of three main areas : Panels, Anchored palettes and A 3D workspace


The dashboard consists of a set of control panels organized by function. For example, the top control panel contains commands that create and modify 3D solids; the second control panel contains commands and controls used to navigate 3D models.

Download free tutorial "AutoCAD 3D Tutorial" here!

Continue to read...

Maya Tutorial : Modeling a Perfect 3D Face

maya modeling tutorial, modeling 3d head tutorial, maya tutorial, 3d modeling tutorials, 3d modeling tutorialHere are many ways in which to model a head in 3D. In this maya 3d modeling tutorial, we'll look at polygon modelling with subdivision smoothing for mesh refinement. This approach enables you to create the topology of the face mesh in a very direct and hands-on manner. With NURBS modelling, creating a human head can be problematic, and the best method involves stitching multiple surfaces together. This takes an awful lot of planning and isn’t a method you can jump straight into. Polygon modelling enables you to correct mistakes more fast and easily.

Correct topology (the way a surface is structured) is the single most important aspect of head modelling. We'll be creating special topological structures, known as ‘edge loops', which outline areas of the face and mimic the rings of muscle under the skin. Without proper loops, a head will be difficult to animate. We’ll also be making sure all the polygons have four vertices (called quads). A mesh of all quads is less likely to pinch when smoothed and animated. Although this tutorial uses Maya, the principles employed are applicable whatever app you use.

Download free tutorial "Maya Tutorial : Modeling a Perfect 3D Face" here!

Continue to read...
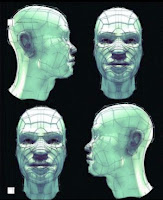
3D Tutorial : Lowpoly Head Modeling

lowpoly modeling tutorial, modeling tutorial, lowpoly modelingThis is the Flash edition of the 3d lowpoly head modeling tutorial. It is navigated if it clicks on both ends on the right and left of the window. This 'swf' tutorial shows ou how to make 3d lowpoly head with cube object. This tutorial can be followed by any 3d grahic software, such as : 3ds max, maya 3d, blender 3d. Follow this tutorial and you can made your own head modeling if you can finish this 3d low poly tutorial.

lowpoly modeling tutorial, lowpoly tutorial, modeling tutorial
Stage 1 (89 pages)
The contour of the head is decided first.
Stage 2 (100 pages)
Improvement in the basic contour.
Stage 3 (182 pages)
The position of the eye and structure are modeled.
Stage 4 (98 pages)
The initial shape of the eyebrow and the eyelid is made.
Stage 5 (133 pages)
A nose is modeled. Arrangement around the mouth.
Stage 6 (139 pages)
A lip and a jaw are modeled.
Stage 7 (143 pages)
An ear and a former head are modeled.
Stage 8 (105 pages)
Hair and eyelashes are modeled. Then, completion.

Download free tutorial "3D Tutorial : Lowpoly Head Modeling" here!

Continue to read...

Illustrator Tutorial : Cutaway Technical Illustration

illustrator tutorials, illustrator tutorialThis is a free illustration tutorial designed to provide helpful information related to computer graphics. Additionally, there are detailed step-by-step Adobe Illustrator and Photoshop tutorials, tips and tricks for technical illustration students, professional technical illustrators and digital artists.
All of the initial line artwork was done in vector based Adobe Illustrator CS. Most of the final color work (Page 2 - Photoshop Tutorial) was done in Adobe Photoshop. The techniques used in this demonstration tutorial are applicable to any 3 dimensional perspective drawing, regardless of scale or complexity.
This illustrator tutorial project presented many unique challenges. The actual ship (Radiance of the Seas) was still in Germany being completed for Royal Caribbean when I started the project. There was no photography or CAD reference to work from, only the paper blueprint you see below. In order to have the brochures completed by the time the ship went into service, the final illustration had to be finished in under two months.

The first step was to map out the physical space that the ship would occupy (below) by creating a perspective grid. By establishing a horizon line and vanishing points, an angle was developed that showed the maximum amount of features on the ship.
Technical Note: This type of angle is generally referred to as a 3/4 perspective view. For more information on perspective drawing techniques used in mechanical drafting and architectural drawing, go to: 2 Point Perspective Drawing Tutorial.

Download free tutorial "Illustrator Tutorial : Cutaway Technical Illustration" here!

Continue to read...

Perspective Drawing For The Technical Illustrator

illustrator tutorial, illustration tutorial, tutorial illustrator, illustrator tutorials"Basic Principles Of Perspective Drawing For The Technical Illustrator".A thorough understanding of the principles of 1-Point and 2-Point Perspective is essential to creating an accurate, and visually appealing piece of art. A lay-person with no technical understanding of the principles of perspective drawing will nonetheless have an intuitive negative reaction to a piece of art in which something is amiss. Using the perspective techniques shown in the preceding tutorials, the mental impression they will make on a viewer will be so strong that once mastered, the illusion of 3-dimensional depth will remain, even when the visual trickery involved in the process has been revealed.

Any good technical illustration starts with well executed line art. If you are working from any type of reference other than a CAD output in the desired angle, you will need to have a strong fundamental understanding of the principles of perspective drawing. This page will cover the various types of perspective angles you will encounter. In the tutorial lessons that follow this page, you will be given the tools needed to map out a perspective grid for any s-dimensional situation. From this grid, you will be able to create realistic three dimensional drawings from flat or "Off Angle" reference.

Download free tutorial "Perspective Drawing For The Technical Illustrator" here!

Continue to read...
Fireworks Tutorial : Graphic Design Basic

fireworks tutorial, graphic design tutorial, design tutorial, fireworks tutorialsThis tutorial will guide you through the basic tasks of designing graphics with Macromedia Fireworks MX 2004. You’ll get hands-on experience using the industry’s leading web graphics application and learn basic graphic design concepts along the way. If you are already familiar with designing graphics in Fireworks, you may want to proceed to the “Web Design Basics Tutorial,” where you’ll learn about designing web pages with Fireworks.

What you’ll learn
By taking this tutorial, in less than an hour you’ll accomplish the tasks required to create an ad for classic rental cars using Fireworks. You will learn to do the following:
• View the completed file
• Create and save a new document
• Explore the Fireworks work environment
• Create and edit vector objects
• Import a bitmap and select pixels
• Add and edit Live Effects
• Work with layers and objects
• Create and edit a mask
• Create and edit text
• Export the document

What you should know
Although this tutorial is designed for beginning Fireworks users, it covers many advanced features in Fireworks, so experienced Fireworks users can benefit from it, too. You don’t need to be a graphic designer to perform this tutorial, but you should possess basic computer skills and be able to use common desktop applications. This includes knowing how to browse for files and folders on your hard disk.

Download free tutorial "Fireworks Tutorial : Graphic Design Basic" here!

Continue to read...
Flash Tutorial : Make a Button

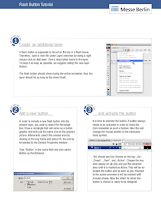
flash tutorial, making a button, flash tutorialsThis flash tutorial is about to make a button for your website. This simple flash tutorial is for beginner so you can follow this flash tutorial easily. A flash button is supposed to be set on the top in a flash movie. Therefore, open a new file under Layer overview by doing a right mouse click on Add layer. Give a descriptive name to the layer. To keep it as easy as possible, we suggest calling the new layer Button.

The flash button should show during the entire animation, thus the layer should be as long as the movie itself. In order to include a new flash button into the present layer, you need to select the Rectangle tool. Draw a rectangle that will serve as a button graphic and with just the same size as the present picture.Afterwards, select the created area by clicking at the key frame and press F8.

Download free tutorial "Flash Tutorial : Make a Button" here!

Continue to read...
Creating PDF Documents From Web Pages

web design tutorial, pdf tutorials, pdf tutorial, free tutorial, free tutorialsYou can use Adobe Acrobat 9 Pro to capture web pages and convert them into a PDF for viewing offline. When you convert a web page to PDF, the HTML file and all associated files—such as JPEG images, Adobe Flash files, cascading style sheets, text files, image maps, and forms—are included in the conversion process.

The resulting PDF behaves much like the original web page. For example, the images, links, image maps, and most media files appear and function normally within the PDF. (Animated GIF files appear as still images, showing the last frame of the animation.)

Download free tutorial "Creating PDF Documents From Web Pages" here!

Continue to read...

How to Create an E-Commerce Web Site

web design tutorial, web tutorial, web tutorials, web design tutorialsYour business may be small - but the Internet lets you think big.Whatever product or service your business offers, the Internet levels the playing field and lets you compete with bigger businesses, reaching customers around the world who can conveniently buy from your online storefront 24 hours a day.
In the competitive world of the Web, growing your business and increasing your profits online requires careful planning and important steps. For every successful e-commerce business, there are dozens that fail because they don't address basic risks and pitfalls along the way. So to take full advantage of the e-commerce opportunity, make sure you base your Web business on a solid foundation that covers every element of e-commerce.

This web design tutorial "How to Create an E-Commerce Web Site" CONTENTS :
• Introduction:The Elements of E-Commerce • Step One: Establish Your Online Identity • With the Right Web Address • What's In a Name? • How to Get and Manage Domain Names • Step Two: Build a User-Friendly Site • Plan Your Site Carefully • Choose the Right Site-Building Tools • E-Commerce Site Design Tips • Step Three: Set Up Your Web • Server-or Select an ISP to Host Your Site • What to Look for in a Web Hosting Company • Step Four: Minimize the Risks of E-Commerce • The Risks of E-Commerce • The Trust Solution: Authenticated SSL Certificates • How Authenticated SSL Certificates Work • Secure Your Site with a VeriSign SSL Certificate • VeriSign's Authentication Practices Are More Trustworthy • Attract More Customers With the Secure Site Seal • Your Privacy and Security Statement • Step Five: Accept and Manage All Kinds of Payments • The Internet Payment Processing System • Payment Authorization and Settlement • VeriSign Payment Services • Set Up Your Internet Merchant Account • What You Should Know About Fraud • Step Six: Test, Test, Test • Step Seven: Promote Your Site • Now, Start Selling
Getting Started

Download free tutorial "How to Create an E-Commerce Web Site" here!

Continue to read...

September 6, 2009

Illustrator Tutorial : Bitmap Into Vector

illustrator tutorial, adobe illustrator tutorial, bitmap to vector tutorial, illustrator trace tutorialOne of the most common tasks in illustration is taking a photograph or hand sketch and converting it into path-based vector art using Adobe® Illustrator®. Before Illustrator CS2, this meant long hours with the autotrace tool or using other applications like Adobe Streamline®. Today, going from bitmap to vector art is a matter of seconds, in as little as one click using the new Live Trace feature in Illustrator CS2.

Perhaps one of the most common tracing tasks in Illustrator is creating a hand sketch, scanning it into your computer, and then tracing it into vectors. Live Trace takes this once-laborious process and makes it simple.

Download Free PDF Tutorial "Illustrator Tutorial : Bitmap Into Vector" here!

Continue to read...

September 4, 2009

Illustrator CS4 Tutorial : Narrative Painting

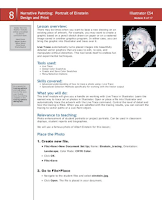
free pdf tutorial, illustrator tutorial, painting tutorial, illustrator free tutorialThis Narrative Painting: Portrait of Einstein Illustrator CS4 is brief module that will give you a handle on working with Live Trace in Illustrator. Learn the easiest way to trace art or photos in Illustrator. Open or place a file into Illustrator and automatically trace the artwork with the Live Trace command. Control the level of detail and how the tracing is filled. When you are satisfied with the tracing results, you can convert the tracing to vector paths or a Live Paint object.

Skills covered:
• Advanced understanding of how to trace a photo using—Live Trace
• Specialized Selection Methods specifically for working with the Vector output

There may be times when you want to base a new drawing on an existing piece of artwork. For example, you may want to create a graphic based on a pencil sketch drawn on paper or on a rastered image saved in another graphics program. In either case, you can bring the graphic into Illustrator and trace over it.
Live Trace automatically turns placed images into beautifully detailed vector graphics that are easy to edit, re-size, and manipulate without distortion. This tool lends itself to endless fun and experimental techniques.

Tools used:
• Live Trace
• Global Color Swatches
• Create and Save Color Swatches
• Menu/Selection Options
Download Free PDF Tutorial "Illustrator CS4 Tutorial : Narrative Painting" here!

Continue to read...
Photoshop Tutorial : Creating Flaming Text

photoshop tutorial, photoshop basic tutorial, flaming text tutorialThis tutorial will guide you in creating a flaming text effect in Adobe Photoshop. Photoshop may be a very powerful software program used by design professionals around the world, but this photoshop tutorial is designed for anyone with a basic knowledge of the program. The first time you use this photoshop tutorial, it should take you around twenty minutes to create your flaming text from start to finish, but that time may vary depending on your skill level in Photoshop. After completing this photoshop tutorial, you will hopefully have learned something new about the amazing software that is Adobe Photoshop.

This tutorial was designed around Adobe Photoshop CS2, so if you are running a different version of Photoshop on your computer, some of the images below may not be the same ones that you see.
Download Free PDF Tutorial "Photoshop Tutorial : Creating Flaming Text" here!

Continue to read...

Photoshop Tutorial : CREATE A DIGITAL FIRE

photoshop tutorial, fire effect with photoshopWord from author "This is one of the more creative use of filters I have run across. The effect itself may be more frivolous than useful, but this technique does show off how experimenting with Photoshop’s different filters can produce some interesting results."
This photoshop tutorial is about to make fire with standard efect photoshop bundle. With only 4 steps technique you can create your own fire effect like pro. This photoshop tutorial is easy to follow even with beginner.

The basic steps of this technique has been floating around the Internet and on different online services for a couple years. The first version of this technique I remember reading was a small text file titled “Sal’s Flaming Text Effect.” Since then the basic steps have been covered in a variety of different places.
This issue starts with the step-by-step procedure for creating the basic flaming effect. Then we add a technique to allow you to lay your flames over another background image. Finally you can combine several layers to create the example at the bottom of the page.

Download Free PDF Tutorial here!

Continue to read...
September 3, 2009

Flash Game Tutorial : Make A Hidden Objects

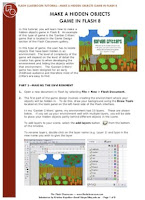
free pdf tutorials, flash game tutorial, flash tutorialIn this tutorial, you will learn how to make a hidden objects game in Flash 8. An example of this type of game is the ‘Garden Critters’ game that is located in the Game Design section of the Flash Classroom gallery.
If you’ve got to this point, why not learn more about game design and how to enhance your game with a customized mouse or sound by completing the following Flash Classroom Tutorials.

In this type of game, the user has to locate objects that have been hidden in an environment. The level of complexity of the game will depend on the level of detail the
creator has gone to when developing the environment and hiding the objects within that environment. The ‘Garden Critters’ game has been designed for an early childhood audience and therefore most of the critters are easy to find.


Download Free PDF Tutorial "Flash Game Tutorial : Make A Hidden Objects" here!

Continue to read...

Image processing with Gimp: Part 3

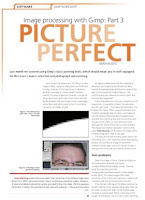
gimp tutorial, free pdf tutorial, free gimp tutorial, gimp image processingImage processing with Gimp: Part 3 "PICTURE PERFECT" by Simon Budig. Word from author "Let’s conduct an experiment: Try filling in a new image in black, create an ellipse and use the fill tool to colour it white. At first glance you’ll see that a perfectly clear egg on a black border has been created. On closer inspection however, a couple of things don’t look quite right. You’ll notice that the border between the two images is not a hard edge where black and white meet. In fact it is a muddy concoction of shades of grey."

By taking a closer look with the magnifying glass tool, you’ll see that the fill tool has filled beyond the selected area and that the inside of the egg is not consistently shaded (Figure 1, the marching ants are coloured for clarity’s sake). But how has this happened?
Gimp pixel selection is not just a simple on or off proposition. It is possible to select the saturation level for each pixel — the higher the saturation, the brighter the colour. When using the selection tool to select a gradated area of colour, you’ll discover that the whole of the area doesn’t appear to be selected. The marching ants only surround an area of colour with a 50% or more saturation level, although the whole of the area is in fact selected. The ellipse tool employs saturation options when using Anti-aliasing, which means the edges of the finished image don’t look so serrated.
The idea of only half selecting pixels seems a bit odd at first, but is very important when reprocessing photos. You will find an image of me on the coverdisc (simon.png), and we’ll use this to take a look (you can of course use a picture of your own).


Download Free PDF Tutorial "Image processing with Gimp: Part 3" here!

Continue to read...

Making a Blog

free pdf tutorial, making a blog, pdf free tutorial
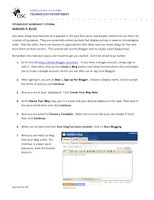
Like wikis, blogs have become very popular in the past few years, and people continue to use them for a variety of purposes. They are essentially online journals that display entries in reverse chronological order. Also like wikis, there are dozens of organizations that allow users to create blogs for free and store them on their servers. This tutorial will use the Blogger tool to create a post (blog entry).

Remember, this tutorial is basic and meant to get you started. Don’t be afraid to go further.
1. Go to the site https://www.blogger.com/start . If you have a Google account, simply sign in with it. Otherwise, click on the Create a Blog button and follow the directions (this will enable you to make a Google account, which you can then use to sign into Blogger).
2. After signing in...

Download Free PDF Tutorial "Making a Blog" here!

Continue to read...

September 2, 2009

Photoshop & Painter Tutorial : How to Draw Manga

how to draw manga, drawing mangaThis tutorial guides you through the process of drawing and colouring a manga picture. Manga artwork often suffers the unfair stigma of appearing all the same. Although there are general stylistic conventions, every artist interprets it differently, creating a host of unique styles. The more you draw, the faster you will discover your own style, both in character design and colouring. The colouring technique outlined here was done in Photoshop CS and Painter IX.

Word from author "I also used a graphics tablet, which is an invaluable tool for anyone going into digital art. Wacom tablets often come with a free version of Painter Essentials. Although it’s not as good as the full version, the effects demonstrated in this tutorial can be re-created (with a bit of practice) in Painter Essentials.
I like to sketch and ink by hand, then scan the outlines and colour them on the computer. Great care should be taken over the sketch because it forms the backbone of your work. Even the best colouring technique won’t be able to salvage a poor, out-of-perspective drawing. When sketching, I check for mistakes by holding the drawing up to a mirror. Inking is done in black ink, with a thin fineliner or nib pen. When working digitally, my files will most likely be in PSD format (to support layers). The final image is then flattened and saved as a TIFF or JPEG (at least 300 DPI). TIFF is better quality for print. JPEG has a very small file size, making it suitable for pictures on the web."

Download Free PDF Tutorial "Photoshop & Painter Tutorial : How to Draw Manga" here!

Continue to read...

Maya Tutorial : Basic Walk-Cycle

walkcycle tutorial, maya walkcycle, free tutorial, maya tutorialAlthough other rigs can be used as well, this tutorial is intended for you to use the “Walking Ball” character setup created by the author. This tutorial is intended to teach new animation students a few basic animation techniques and workflow based on fundamental animation principles using Maya and a free character setup named walkingBall_v2.3 created by the author. This character setup or “rig” has many useful features without being overwhelming to newer students. This tutorial assumes you have a basic understanding of how to navigate the Maya interface, find menu commands, and
other basic computer file management skills.

This tutorial also assumes you are somewhat new to 3D software and animation concepts.
We will be using a basic pose-to-pose approach of animation. Pose-to-pose animation is what its name implies, creating character movement by establishing primary positions, or poses, and methodically moving the character from one pose to the next. Different, but just as valid methods such as straight-ahead or layered animation are not described in this tutorial.

Download Free PDF Tutorial "Maya Tutorial : Basic Walk-Cycle" here!

Continue to read...

Blender 3D Tutorial : Walkcycle Animation

walkcycle tutorial, blender 3d tutorial, animation tutorialTurn a simple walk cycle into a stroll with style! Improve your character animation in our Blender masterclass, which makes use of genuine rigs from the movie Elephants Dream BY BASSAM KURDALI.
walk cycles are one of the staples of 3D character animation. Yet it’s all too easy to end up with bland, robotic movements. In this tutorial, you will learn how to create a walk with personality, keyframing and refining a basic movement cycle, then layering secondary animations over the top.

For this, we will use Blender’s NLA Editor (Nonlinear Animation Editor). It works just like a video editor, but using animation ‘strips’ instead of video clips. Each strip represents instances of an action that can be moved, scaled in time or layered on top of other strips. This allows you to create an action that contains one walking cycle, while the strip itself contains as many cycles as are required for your character to walk along the path you have assigned to it. The repetitive nature of the cycling can be offset by using additive action strips to alter the motion, or by adding other strips to layer different actions on top of the walk.
In the tutorial, we’ll be using Proog, the lead character in the world’s first open source animated film, Elephants Dream. First, we’ll keyframe a basic walk cycle and make the action loop properly, then put him on a path and add some actions and layer animations on top of his walk. Finally, we’ll look at some of the extra cloth animation controls the character rig contains. Don’t worry too much about Proog’s coat until the very last step of the tutorial – to look good, it needs some hand tweaking. The walkthrough is intended for readers who already have some familiarity with both Blender and the basic concepts of animating a walk cycle. If you get stuck, refer to the annotated screenshots on the CD. The disc also contains a set of numbered scene files that will enable you to pick up the tutorial again at the corresponding steps, and more are available for download from www.3dworldmag.com/stoppress.
The Proog model itself is the genuine rigged character from the movie, and is available under a Creative Commons attribution licence, so it can be used for any project you like.
Most of the tutorial can be completed in Blender 2.41, which is included on the disc. However, some of the advanced steps require Blender 2.42, which should be a free public
download from www.blender.org by the time you read this.

Download Free PDF Tutorial "Blender 3D Tutorial : Walkcycle Animation" here!

Continue to read...

Flash Animation for Beginners

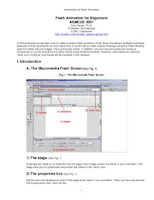
animation for beginners, flash animation, flash tutorialIn this "Flash Animation for Beginners" tutorial we will learn how to make a simple Flash animation of the direct fluorescent antibody technique. Because of time constraints we won’t have time to cover how to make original drawings using the Flash drawing tools but rather will use images I have previously drawn. In addition, we won’t be using stop and continue commands to run the animation but rather will be using timed text inserts. However, instructions for inserting “stop” and “continue” commands will be included in this handout.

"Flash Animation for Beginners" Contents :
Introduction : The Macromedia Flash Screen, Drawing or Importing Objects, Converting Objects to Symbols, Converting a Frame into a Keyframe, Clearing a Keyframe, Adding Frames, Deleting Frames.
Beginning Your Animation: The Direct Fluorescent Antibody Technique: Positive Test : Moving the Animation Title Text On to the Stage, Add Unknown Antigen (Bacterium) to the Animation, Add Known Fluorescent Antibodies to the Animation, Moving the Fluorescent Antibodies to the Antigen, Wash Slide to Remove Unbound Antibodies, Showing the Known Antigen Fluorescing, Ending the Animation, Publish and Play the Animation.
Other Bells and Whistles : Moving an Object Along a Path, Scaling an Object, Tweening Color During Motion, Tweening Transparency During Motion, Using Buttons to Play, Stop, and Continue, Publishing a Flash Animation in a HTML Web Document, Publishing a Flash Animation as a QuickTime Movie.
Your Next Animation: The Direct Fluorescent Antibody Technique: Negative Test.
Sample Animations.

Download Free PDF Tutorial "Flash Animation for Beginners" here!

Continue to read...

Flash Animation with ActionScript 3.0

flash animatio, flash tutorial, actionscript 3.0 tutorialPushed for time? Deadlines looming? Learn to copy tweened animations to ActionScript and you can save yourself hours of effort. Your motion tween can be as long as you
like, provided it s on a single layer. It can contain multiple tweens and keyframes, as well as blank and hold keyframes. Animated filter effects can also be included, as well as Alpha and scale effects. You can capture the motion of a number of Motion tween properties. These are: Transformation point, Colour, Skew, Scale, Rotation, Position values, Filters, Custom easing, Cache as Bitmap setting, Blend modes, Position, Orientation to motion paths, Frame labelling and Motion guides.

In Flash, keyframing animations and producing motion tweens can be a laborious process – particularly if you have to create the same style of animation over different movie clips across several Flash movies. This can be a massive drain on resources. It's a case of going back to the drawing board and starting the animation again.
Or is it?
One of the best features to come along in Flash CS3 is the ability to copy tweened animations to ActionScript 3.0. This way, youre able to take your finessed animation efforts and convert the animation to ActionScript code. This code can then be reapplied to any Flash movie clip – in any Flash movie. An instant time-saver in only a few clicks. Sounds too good to be true? Well dont worry, theres no catch: just a straightforward technique that could put you ahead of the game when it comes to delivering client creative. Read on to find out how to put it into action.

Download Free PDF Tutorial here!

Continue to read...

GUIDE TO COMIC MAKING IN PHOTOSHOP

how to draw comic, making comic with photoshopWord from author "Okay, so you wanna make a comic, but dont know how? I'll show you how I make my comics. Throughout this tutorial, I will be using Adobe Photoshop 7.0. If you have a different version, some things may be different for you. Just try to make things work.

All right, now, how to start? Ah yes. Creating a Photoshop document. Open up Photoshop and choose New from the File menu (or press Ctrl-N). A dialog box will open up asking for the dimensions of the image. Since I'm creating a six-panel comic using backgrounds from 16-bit games, I'm gonna make the dimensions 643x758 pixels. (You can edit this to suit your needs.) Leave the Resolution settings...

Download Free PDF Tutorial "GUIDE TO COMIC MAKING IN PHOTOSHOP"here!

Continue to read...

How to Make a Comic Book

How to Make a Comic Book, making comic, how to draw comicAbstract: This document discusses how to make a comic book on a personal computer. Word from author "Producing a comic book is a large effort. Wherever possible I use the abilities of the personal computer (and associated technology) to remove as much burden as possible from the comic book creator."
Some Details:
My comic book is a standard-sized print (6 5/8” x 10 1/4”), full color covers and full color interiors, with 24 pages of interior content. The ‘live area’ (i.e. where the comic content resides) is 6” x 9” centered on the page. Some of my work goes outside the live area- and even off the page. (Be sure to check with your printer in advance on their recommended ‘live area’ dimensions.)

Disclaimers:
Some of the software programs mentioned in this document are my own creation. Readers are free to use these programs for their own projects. Although the programs work on my computer system, they may not work on other versions of OS/ platforms/ etc. Source code and instructions for use for these programs is provided at my website for individuals to re-compile/ modify to meet their own needs/ systems.
Download Free PDF Tutorial "How to Make a Comic Book" here!

Continue to read...