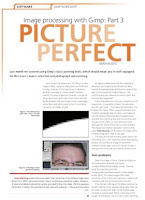
 Image processing with Gimp: Part 3 "PICTURE PERFECT" by Simon Budig. Word from author "Let’s conduct an experiment: Try filling in a new image in black, create an ellipse and use the fill tool to colour it white. At first glance you’ll see that a perfectly clear egg on a black border has been created. On closer inspection however, a couple of things don’t look quite right. You’ll notice that the border between the two images is not a hard edge where black and white meet. In fact it is a muddy concoction of shades of grey."
By taking a closer look with the magnifying glass tool, you’ll see that the fill tool has filled beyond the selected area and that the inside of the egg is not consistently shaded (Figure 1, the marching ants are coloured for clarity’s sake). But how has this happened?
Gimp pixel selection is not just a simple on or off proposition. It is possible to select the saturation level for each pixel — the higher the saturation, the brighter the colour. When using the selection tool to select a gradated area of colour, you’ll discover that the whole of the area doesn’t appear to be selected. The marching ants only surround an area of colour with a 50% or more saturation level, although the whole of the area is in fact selected. The ellipse tool employs saturation options when using Anti-aliasing, which means the edges of the finished image don’t look so serrated.
The idea of only half selecting pixels seems a bit odd at first, but is very important when reprocessing photos. You will find an image of me on the coverdisc (simon.png), and we’ll use this to take a look (you can of course use a picture of your own).
Download Free PDF Tutorial "Image processing with Gimp: Part 3" here!
Tutorial Free Resources and all about providing everyone good tutorials, free tutorials, illustrator tutorial, flash tutorials, animation tutorial, computer tutorial, 3ds tutorial, website tutorial, web design tutorial, photoshop tutorial, painting tutorial, free tutorial
